


Starting Seeds Indoors
Step #1 Buy Good Seeds!
In order to grow healthy plants, you need to start with good seeds. As tempting as the $1 seeds at
big box stores might be, it is better to buy from reputable companies. They are fresher & have better germination rates.
For a great list of Canadian seed growers check out Seeds of Diversity Seed listings or this list of local Petebrorough Seedy Sunday vendors

#2. What to start indoors & when?
Some seeds need more of a head start than others. Starting seeds indoors will help you eat delicious produce earlier. Use the following as a basic guide for planning your planting dates. Find the frost date for your area online. Use this handy chart from You Grow Girl to help!
Quick Tip: Plants such as tomatoes, peppers, brassicas, and eggplants like to have almost a two month head start indoors to make the plants as productive as possible.
#3 Soil
Use ‘soilless medium’ (pro-mix) to start your seeds in. It is light & has minerals mixed in that will allow your seedlings to grow easily. You can mix in compost & nutrients once you transplant. Moisten soil evenly before adding to containers.
Quick tip: You can also make your own soil-less mix by combining:
8 parts pre-moisoned peat moss or coconut coir
1 part perlite
1 part vermiculite
#4 Containers
You can start seeds in a lot of different type of containers (plastic seed trays, milk cartons, egg cartons, ect). The most important thing to consider is drainage. If your container doesn't already have a whole for drainage, you will need to create one so that the plant doesn't get soggy roots or mouldy. Also, be sure that if you are reusing containers that they are cleaned with warm soapy water & bleach first.

#5 Seeding!
Fill your containers with moist soilless medium. Create divots in the soil for the seeds. Place one or two seeds in each container. Cover lightly with soil. Make sure you la bel your plants. You don’t want to get mixed up if you are planting a lot of varieties of one type of plant.
Make sure you label what you have planted right away, otherwise it is very easy to forget what you have planted!
Quick tip: Cut up and re-use vertical blinds for labels.

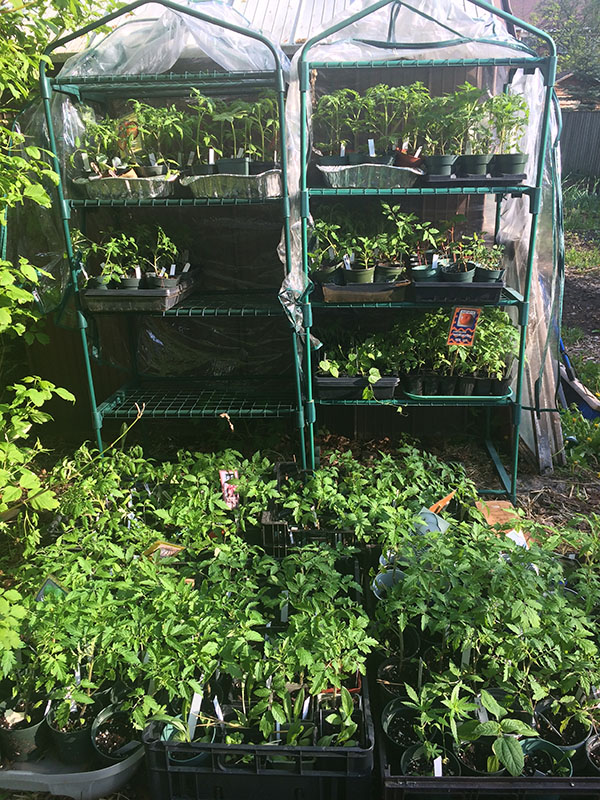
#6. Where to grow the seedlings?
Place your seedlings in the brightest, warmest window you have. If the plants have to stretch for light, they will get long & leggy. You can use space heaters & grow lights to create these conditions if you don’t have a greenhouse or sunny window.
#7 Airflow
Putting a fan on your seedlings is a good idea. It will help air flow in the room, preventing dampening-off disease or mould from forming. It will also make your plants stronger & more resistant to wind once they are living outside
#8 Transplanting
Once your plants have started to outgrow their pots, you can transplant them. You can be creative with your containers as long as there is good drainage. Mix compost, peat moss, vermiculite & potting soil to give your seedlings some food. Fill new container half-way with moist soil. Carefully remove seedlings from original containers. Place them in new pots & fill up with soil.
#9 Hardening off
In order for your seedlings to thrive living in the great outdoors, you will need to help them adjust. Place them outside in speckled light on warm days, gradually increasing the amount of time they spend in sun or cooler temperatures over a week or two before they go outdoors permanently. This will prevent sun or cold damage.